 English
 Deutsch
 Slovensky
 Česky
ČeskyLinking Adobe DNG Converter with Zoner Studio
Linking the DNG Converter with Zoner Studio
Common Problems Related to the DNG Converter

Zoner Studio natively supports a wide range of commonly available cameras, allowing you to open RAW files from these cameras in the program without any issues.
However, if we don’t have native support for a specific camera, it is still possible to work with such RAW files in Zoner Studio by using the Adobe DNG Converter add-on.
Downloading the DNG Converter
You can download the DNG Converter installer from the Adobe website by clicking the button Download the latest DNG Converter for Windows x64/ARM x64. After downloading, locate the file on your computer and double-click it to start the installation.

If you did not specify a different save location, the installer will most likely be in your Downloads folder. The installer’s name will look like this: AdobeDNGConverter_x64_####.exe or AdobeDNGConverter_arm64_####.exe.
The # symbols represent the current version number of the converter.
Installation Process
When you start the installer, your operating system will first ask if you want to allow the application to make changes to your computer. Click Yes to proceed. The installation will then start.
- In the License Agreement step, click I accept the agreement and then Next.
-
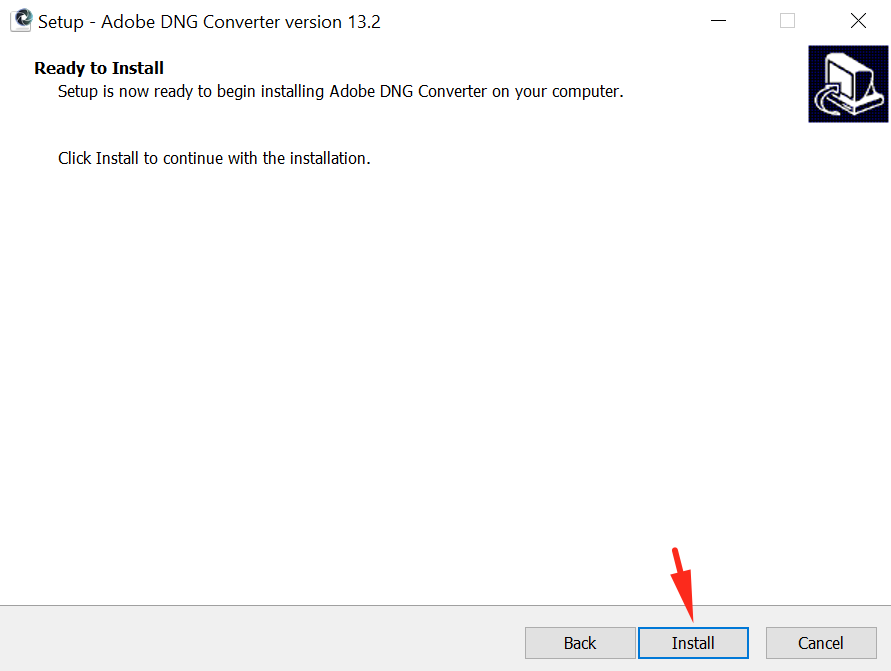
In the next step, the installer will confirm that everything is ready. Click Install.
- Wait for the installation to complete.
- When it finishes, the installer will notify you. Uncheck the option Launch Adobe DNG Converter and click Finish.

Linking the DNG Converter with Zoner Studio

After installation, the DNG Converter must be linked to Zoner Studio so that Zoner Studio can use it to process RAW files.
- Open Zoner Studio and go to Preferences (Ctrl+M) | RAW Format.
- Click Browse.
- Locate the file Adobe DNG Converter.exe.
By default, it should be located here: C:\Program Files\Adobe\Adobe DNG Converter
- Check Convert to Linear Image (interpolate) when converting to DNG.
- In the Loading mode for unedited RAW files field, select Automatic.
- In the Loading mode for RAW files edited in older versions of Zoner Studio field, select Adobe DNG Converter.
- After setting the correct path, click Apply to save your settings.
Common Problems Related to the DNG Converter
Incorrect path
A common mistake is entering the path to the installer file instead of the actual Adobe DNG Converter.exe in Zoner Studio. If you do this, RAW processing will not work.
Outdated DNG Converter
If you already have the DNG Converter installed and correctly linked to Zoner Studio, but still cannot open RAW files from your new camera, your version of the converter might be too old and not support your camera.
In this case, download the latest DNG Converter installer and update it.
More information
Check the list of cameras supported by the DNG Converter on Adobe’s website