 English
 Deutsch
 Slovensky
 Česky
ČeskyHow to Edit Video Position and Transformation
- How to Insert a Logo into a Video
- How to Insert a Vertically Oriented Photo into a Video So That It Displays Fully
- How to Place Two Photos Side by Side or One Above the Other
The Position and Transformation tools are used for editing image and text clips, which makes them applicable to videos, photos, and inserted text.
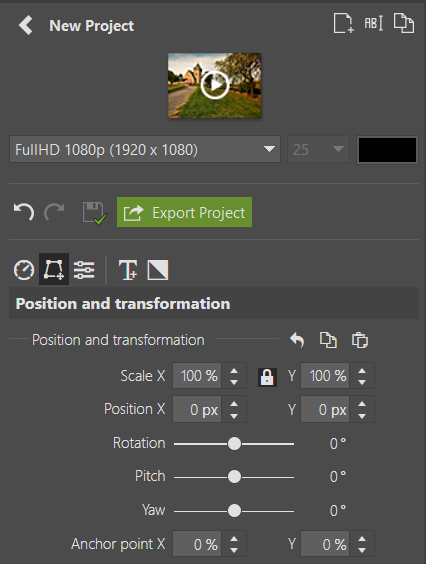
To make them accessible, you must first select an image or text clip on the timeline and then click the Position and Transformation icon in the right panel.
They can then be controlled in two ways:
- by changing the values in the fields and sliders in the right panel,
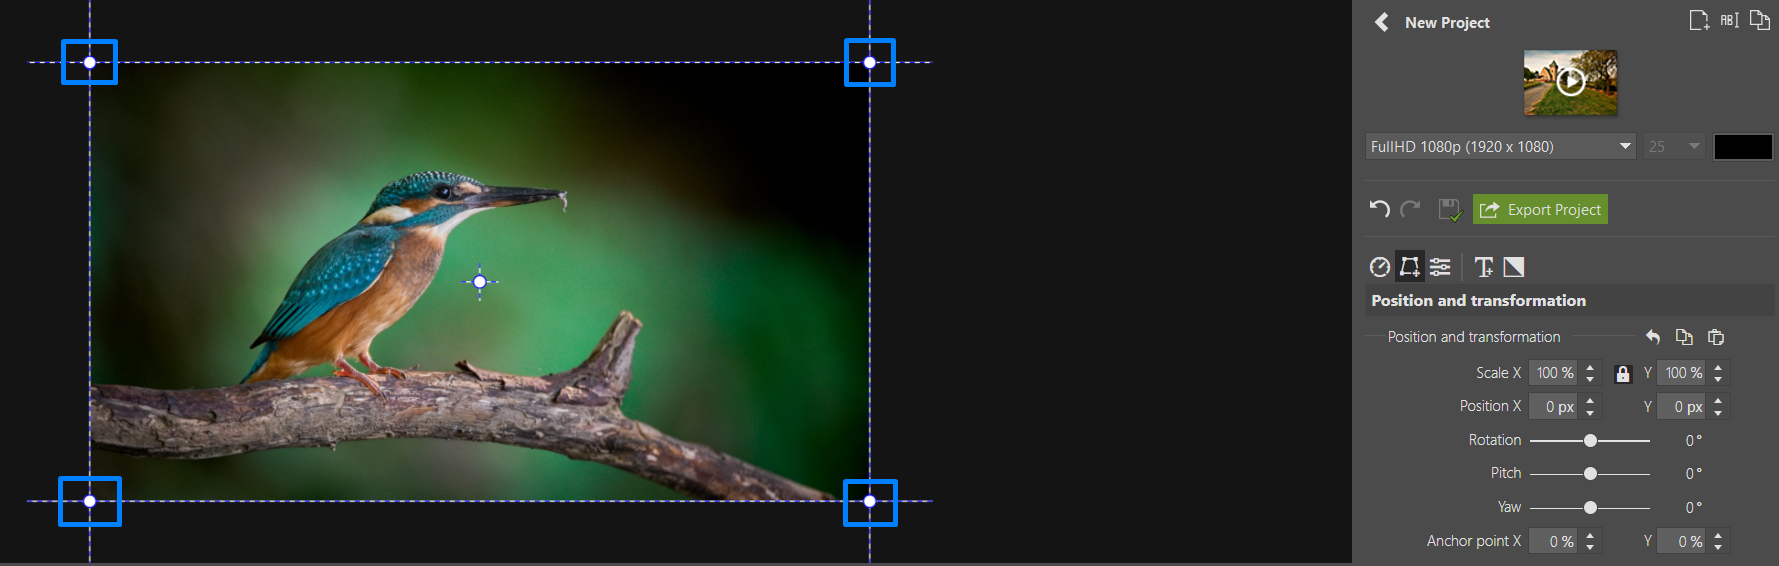
- directly in the video preview using the controls that appear after clicking the Position and Transformation icon.
It is also advisable to combine these two methods of editing. The controls directly in the video preview allow for more intuitive and user-friendly adjustments of the parameters. On the other hand, the sliders make it possible to enter specific and precise values, which allows you to fine-tune the adjustments made in the preview or copy the set value to another clip to give it the same adjustment.
Adjusting Clip Size
The size of a clip can be set using the Scale X and Scale Y functions. This allows you to zoom the clip in or out. In the video preview, these functions can be controlled by dragging one of the corner handles either outward or inward.
In the right panel, in addition to the fields with scale values, there is also a lock icon in the middle. When the lock icon is activated, scaling changes affect both values equally. By deactivating the icon, the image can be stretched or flattened freely. In the preview, these adjustments can be made by dragging the edges of the rectangle that appears around the clip.
Adjusting Clip Placement
The placement of a clip can be changed using the Position X and Position Y functions. Position X determines the position of the clip on the horizontal axis, while Position Y defines the position on the vertical axis. In the video preview, simply click inside the rectangle and drag the clip with the mouse to move it.

Be careful not to grab the point in the middle of the rectangle when trying to change the position. That point changes the position of the Anchor Point, not the clip itself.
Rotating the Clip
The parameters Rotation, Tilt, and Pan allow you to rotate the clip around the Anchor Point in different directions. Rotation spins the clip left and right, Tilt rotates it up and down, and Pan rotates it forward and backward.

In the preview, these parameters can be controlled by clicking and dragging in different areas around the rectangle. The parameter type is also indicated by the cursor changing shape in different regions of the control rectangle.
-
Holding the mouse in the shaded area shows a simple curved arrow on the cursor, indicating control of the Rotation value.

-
On the right and left sides of the rectangle, the cursor shows an arrow over a horizontally oriented line. Moving the mouse up and down in this area controls the Tilt value.
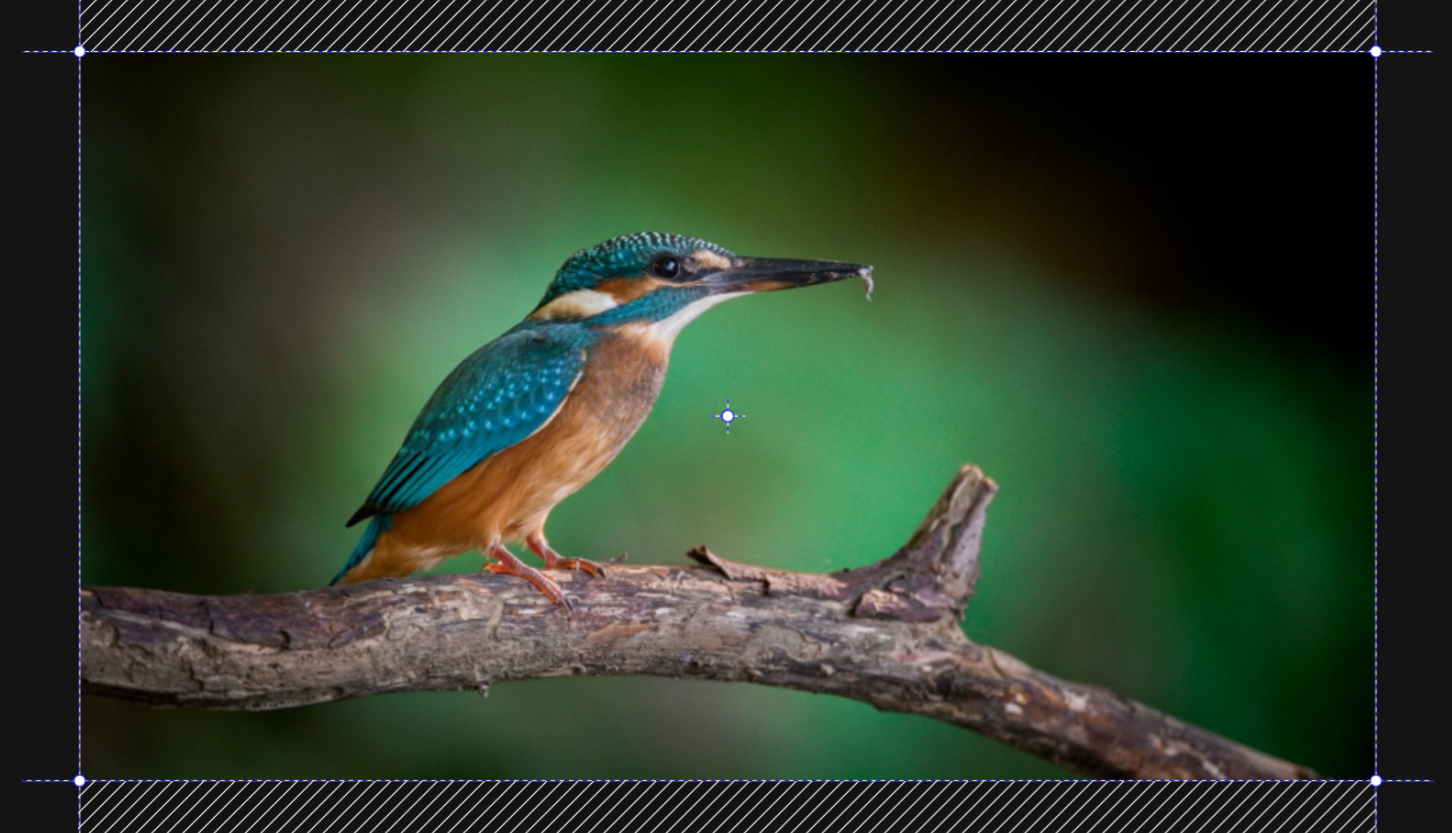
- When the cursor is above or below the rectangle and displays an arrow over a vertically oriented line, you are controlling the Pan value.


The result of adjustments made to Scale, Rotation, Tilt, and Pan strongly depends on the position of the Anchor Point. By default, it is in the center of the clip, but it can be moved anywhere with the mouse, even outside the frame.
When working with scaling, the image zooms toward the anchor point, and during rotation the anchor point defines the axis around which the clip rotates.
Practical Examples
How to Insert a Logo into a Video
With the functions available in the Position and Transformation section, adding a logo to a video is simple. You need a prepared logo file – typically a PNG file with a transparent background works best. In addition, the video must be opened as a project in the Video module.
The video appears in the project as a clip on the timeline in a video track. The logo must be placed on a separate video track. A new track is created automatically when you drag the logo from the filmstrip to the timeline, or you can create one manually by clicking Add Video Track in the left menu.
After inserting, the logo appears as a clip with a preset length. By dragging its edge, you can adjust its duration. Set the length so the logo is displayed for the entire duration of the video, or as needed.
Once the length is set correctly, click on the Position and Transformation section in the right panel. In the video preview, use the corner handles to resize the logo clip. Then drag the logo with the mouse to the desired position, for example, the bottom-right corner. If necessary, fine-tune the values in the right panel to position the logo precisely.
How to Insert a Vertically Oriented Photo into a Video So That It Displays Fully
Sometimes you may need to create a horizontally oriented video from photos that are vertically oriented. In such cases, the default setting of the Video module crops the photos so they fill the entire video area. However, this default can be changed in just a few clicks.
Click on the clip containing the photo in the timeline, or hold Ctrl and click each clip with vertically oriented photos. Then, in the right panel, open the Position and Transformation section and find the Primary Transformation area. Here you’ll find the Fit Mode option. The default is Fill, but there are three other options. To display the photo uncropped and without distortion, select Fit.
How to Place Two Photos Side by Side or One Above the Other
For two files added to the timeline as clips to display side by side or one above the other, each must be placed on a separate video track. Their durations must also overlap – both must start and end at the same time.
This statement is only a recommendation intended for learning the basics of editing, not an absolute rule. Once you master the basics, you can certainly set different durations for clips and use this creatively.
If each image fills the entire video area, they must be resized using Scale. In the right panel, open the Position and Transformation section and, in the video preview, drag a corner handle inward.
Next, adjust the Position. First, click a clip in the timeline and drag it in the preview to one side. Do the same with the other clip and move it to the opposite side. Any imperfections in placement can be corrected either by dragging with the mouse or by fine-tuning the values in the right panel.